0161 217 0625
Toggle navigation
Home
New In
Artists
Ceramics
Books
Films
Exhibitions
GEOFFREY KEY “MR PUNCH” EXHIBITION
Mark Demsteader Moorland Exhibition
Beyond the Ordinary
JUDITH DONAGHY AS THE BIRD SINGS EXHIBITION
GEOFFREY KEY ‘GOTH ‘EXHIBITION
GEOFFREY KEY RETROSPECTIVE EXHIBITION
JOHN MALTBY RETROSPECTIVE
LOCKDOWN EXHIBITION
HESTER BERRY SOLO EXHIBITION
Continuum Exhibition
Hugh Winterbottom Exhibition
Dave Coulter Solo Exhibition
PREMIERE EXHIBITION
About
We Buy Art
Contact
0 items -
£
0
Home
/ Products tagged “David Alderman gallery”
David Alderman gallery
Showing all 3 results
Default sorting
Sort by popularity
Sort by latest
Sort by price: low to high
Sort by price: high to low
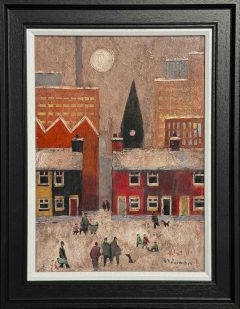
David Alderman – Moon over Hills (Sold)
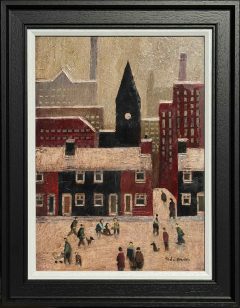
David Alderman – Work and Play (Sold)
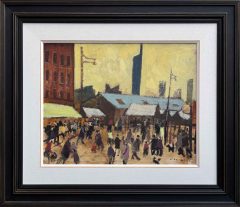
David Alderman – Street Market Salford (Sold)